Showing posts with label homemade. Show all posts

Tuesday, February 17, 2015

Simply Divine Sandwich Bread

Well, after a fantastic Valentine's weekend full of terrific gifts (He loved the picture, btw! :D And I got the most beautiful lilies and new measuring cups<- so excited!), and most importantly quality time, I'm ready to share with you that awesome bread recipe I mentioned last week.

It is adapted from one of the old handwritten recipes that my grandma left me years ago. It is perfect for toast or sandwiches. It is perfect for eating warm with butter. It is, in short, just all around awesome.


You're going to need:
Ten minutes to make the sponge, at least an hour of unattended rising
Ten minutes of kneading, at least an hour of unattended rising
Five minutes of punching and separating, at least an hour of unattended rising
30-45 minutes to bake
An oven
Greased loaf pans (two metal throwaway, or more if you use smaller glass pans, or a cookie sheet if you want to roll this into balls and make hamburger buns)
A large bowl
Plastic wrap
4 TBS Olive oil, plus more for drizzling
3 1/2 TBS Yeast
8+/- Cups Flour
3 Cups Warm water
3 TSP Salt
2/3 Cup Honey (I even had super old honey that had dried out and crystallized - it worked great!)
or 1/2 Cup white sugar

I personally use honey rather than sugar. Yes, it takes more flour. Yes, it is still delicious. If you want to play it safe and use sugar be my guest, but for what it is worth Captain America says the honey tastes better and I tend to agree with him. It also seems to help keep the bread moist - which with the lack of preservatives is a good thing to me.

Dissolve the yeast in the warm water for about five minutes. Add four cups of the flour, 4TBS olive oil, 3TSP salt, and whatever sweetener you're using. I generally add the honey first so that I can swivel the spoon around in the warm water to get it all off, but that is personal preference. Mix all of those ingredients up and cover with the plastic wrap. Let it rise until it is doubled.

Mm, spongey?

This mixture is what is referred to as a sponge. It generally only takes an hour to rise, but the longer you let the yeast sit and do its thing the better your bread is going to taste. Plus, the longer you let things sit the easier it is to work bread baking into your routine. I frequently begin the process on my lunch break and then bake in the evening or even in the morning before work.

They grow up so quickly!

I'm getting ahead of myself. After your sponge has doubled in size you need to add more flour. I generally add three cups and begin incorporating it with one hand (the texture is silky and a pleasure to touch). I then add the next cup (and maybe a little more) a little bit at a time until the dough all sticks together and you can touch it with your clean hand without giant clumps of dough sticking to you.


Punch that dough down. Have stress? Knead that bread. Here is the secret to our grandmother's not killing their husbands (not documented - but pretty sure).

As you can see above, I have taken to kneading the bread in my giant bowl and just drizzling the whole thing in olive oil and tossing it a few times to make sure it is covered, but you can easily knead it on any flat surface and place it in a separate oil coated bowl to rise again.

But why make more dishes? Hmm?

Cover that baby in plastic wrap, you can use the same stuff as before, and let it rise until doubled. It generally takes about an hour, but the temperature of your room has a lot to do with it. Generally 70-80 degrees makes all the little yeasties happy. But if it is colder than that and it takes a while to rise, or if you just ignore it for an extra two hours worry not! You aren't a bad baker. You're imparting more flavor into your bread. Now it isn't just bread, it is ARTISANAL sandwich bread. You're welcome.

KiYai! Bread punch!

Punch the dough down and let it rest for a minute or five before you divvy it up into your greased loaf pans. This recipe makes two loaves if your using the standard metal throwaway pans from a local super center, or three smaller loaves. Or a bunch of  hamburger buns. It's pretty flexible. Just remember that whatever you put it in it will double in size. You're warned. If you throw the whole thing in one loaf pan be prepared for Breadzilla overtaking your oven. Cover those pans with plastic wrap and let it rise until doubled. An hour on the counter, overnight in the fridge, again you're not ignoring it, you're imparting flavor.


When you're ready to bake, PREHEAT your oven to 350 degrees. I mean it. This is not a take and bake pizza that can be thrown in cold and bake as you go. Bread needs the oven to be piping hot to bake correctly. After your oven is properly preheated throw those loaves in and don't open it for at least 30 minutes. It will take 30-45 minutes of active baking time depending on your oven and your pans.

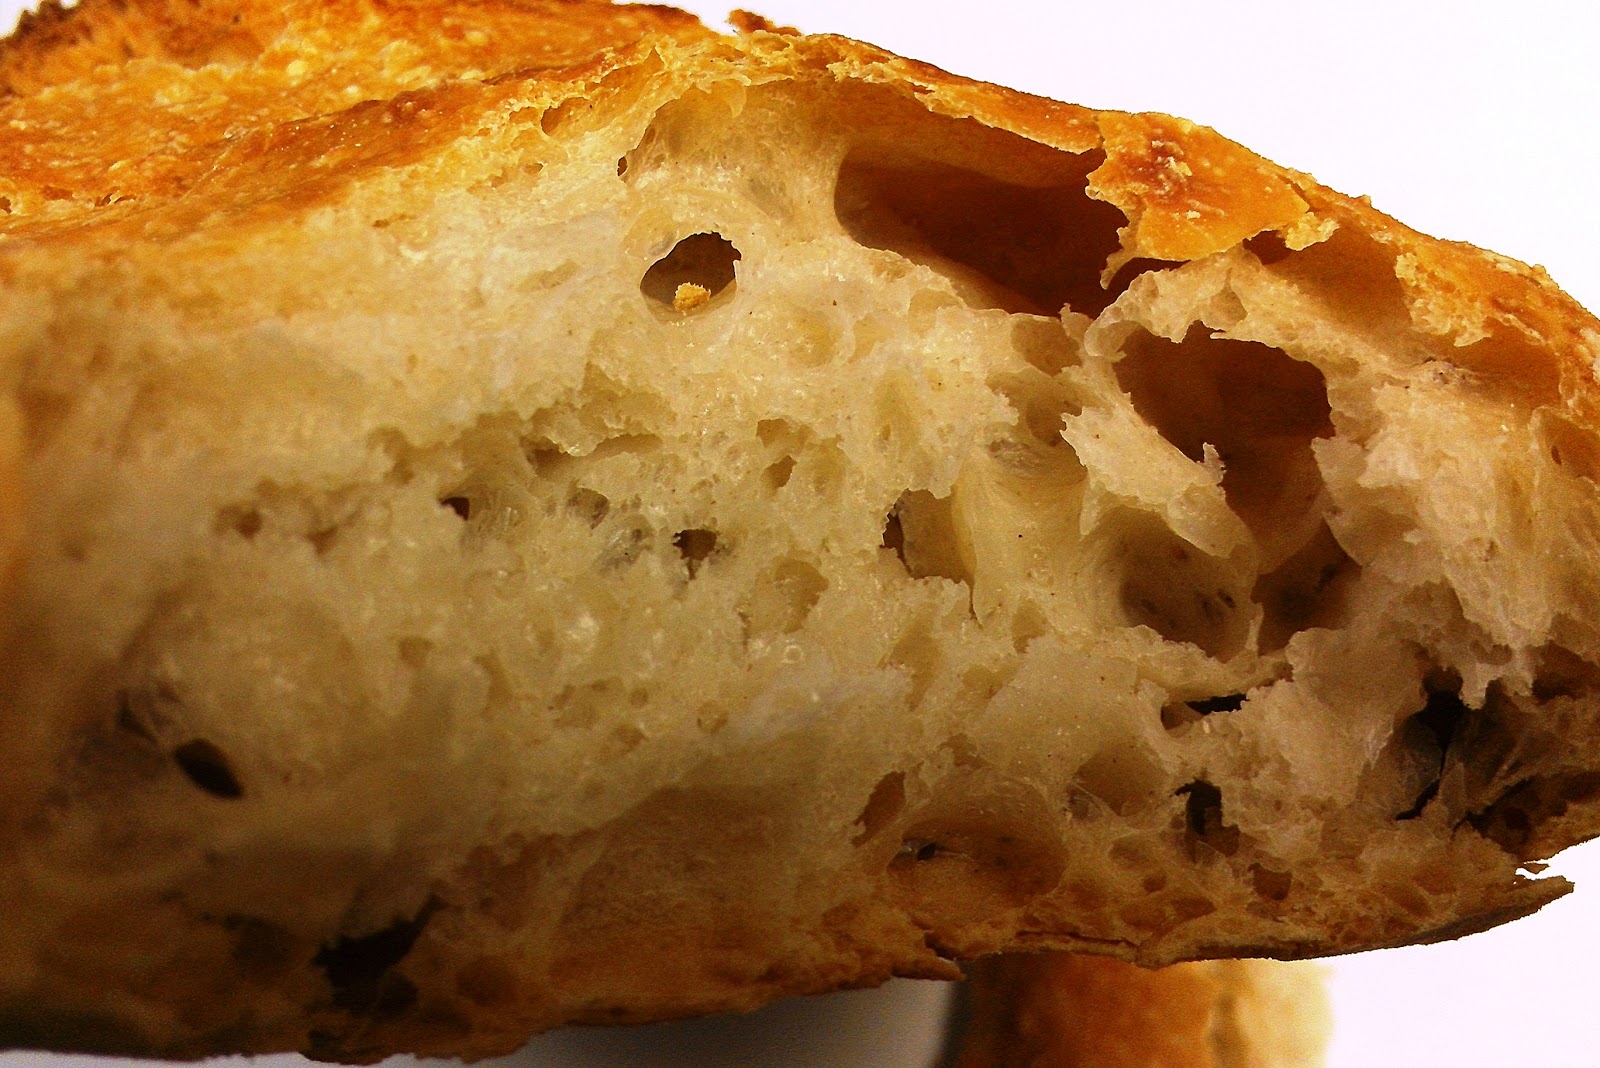
You can tell they are done when the top is golden brown and they ring hollow when tapped. Make sure to let them cool on the top of the stove or counter before you cut into them. The insides are still baking and you don't want to let that heat and moisture out too soon.

These loaves freeze VERY well in gallon freezer bags. Thaw them overnight in the fridge and toss them in the oven to warm up and you have a dinner addition that is sure to wow guests. Or just yourself. Just be warned it is really easy to eat a whole loaf!

This bread stores very well in gallon freezer or storage bags, I would strongly recommend using them. As it is a preservative free product it will dry out and become unappetizing rather quickly if you just leave it on the counter. It is great for bread pudding then, but it gets a little crumbly for anything else.

Wednesday, July 17, 2013

Canning Swag

I really wanted to name this post: I <3 blue Balls. You know, the jars! But I didn't. Because I love you.

So, in other news, there is such a thing as canning swag. Who knew?

Let me introduce you to my new love, Ball’s 100 year commemorative blue pint jars. We met last night, and it was love at first sight. Captain America asked me to come in the house and presented me with a giant box and a pocket knife. What did I find inside, but 18 of these beauties all packaged up and waiting to be my partners in crime! Hats off to Captain America and his ability to pick up and act on my weird wants. All it took was me mentioning seeing them in my favorite blog, Chickens in the Road and they magically appeared!

Remind me to pickle him something next week. That boy is going to drown in jam and chutney. I mean affection, affection! *sigh* Food is "intense like", right?

Clear glass jars seem so plain next to them. I mean I can can tomatoes and they’ll look purple! Green beans are going to be SO green this year! My pantry is going to be a freaking work of art! I can hardly wait to try them. It’s a good thing that tomatoes are ripening, cucumbers are out in full force, and the beans are blooming; because next week, next week, these babies are being put to the test!

Can you see heaven parting, and light shining down?
Is that only in my head?
Ahhh-ahhh-ahhh <-angelic chorus

Monday, May 6, 2013

Reduce, reuse, and recy - play yard pong!

A few months ago a friend and I decided that we wanted to have a Cinco de May-O (spelled that way because we were going for a redneck theme) party. Because who doesn't want to celebrate a Mexican holiday with beer in a water trough? That party was on last Saturday, and I am pleased to say that it went very well.

One good and bad thing about hosting a get together is that it motivates you to get all of your little projects done. Like installing new laminate flooring and learning how to miter quarter round so that you can put a bed in your newly remodeled back bedroom two days before you are going to have guests staying in it and you also have to get all of the herbs planted that you bought at the botanical garden and mulch them in so that your yard doesn’t look like you held up a garden supply center at gun point.

Which is kind of what mine looked like at the start of last week. I hadn’t mown, there was a large pile of brush that I had earmarked for a bonfire along with a bunch of extra newspaper and empty cereal/cat litter boxes that I had saved for fire starters, I had probably close to thirty or forty plants laying around, ten bags of mulch in my back seat (Mercury Milans are surprisingly spacious. I can fit about four straw bales in there at once too.) and I had laminate scraps and the carpet I had ripped out laying around the yard. Actually, given the theme of the party I probably should have left it. Though redneck and white trash aren’t exactly identical…

Long story short, I was a little stressed but it all came together with the help of my friends from out of town. They took to helping me set up, cut trees, and cook with the kind of enthusiasm that makes me want to cry tears of joy. They even helped me put a stallion out on pasture the morning of the party. I have the **BEST** friends.

Having a party like that means that I have been slacking on the blogging front, and I am sorry. But it was a great time, and a fantastic way to develop new games. Like Yard Pong. Which combines the classic drinking game beer pong, with finally finding a use for all of the empty mineral tubs we have laying around. Sustainability and alcohol. It was a great combination.

Yard Pong
2 beach balls
12 empty mineral tubs
Drinks of your choice
Four players

Set the tubs up in a triangle (one, two, three tubs per row) with the tops of the triangle about 10-20 feet apart depending on your athletic ability. Take turns trying to hit the beach balls into the tubs. Use one ball per person on two, two person teams. The scoring is as follows.

If you hit the ball into the tub the opposing team drinks one drink for whichever score it is, first tub = one drink & sixth tub = six drinks.
If you don’t hit any tubs you take one drink.
If you bounce the ball off of a tub the opposing team drinks once for every time the tub is hit, beach balls ricochet well.
Two re-racks are allowed.

Needless to say we had a ball, and I am going to start selling used mineral tubs to college students. That’s one way to recycle and recoup the costs, right? Maybe? There is a whole market here just waiting to be tapped!


Wednesday, May 1, 2013

Ticks and DIY repellent that will knock your socks off!

I think I have a tick borne illness.

One downside to mushroom hunting and gardening, or just living on a farm in general is all of the ticks. I think I had about ten of them on me after last weekend. Normally they don’t bother me too much, but judging by how much my joints hurt and the slight fever I have been running one of the little suckers must have had something. I need 100mg of doxycycline 2x a day, and I need it stat!

I have had this before on a much worse scale, and the doctor refused to give me anything until after my blood tests were back. By then I was asymptomatic, so I didn’t get any antibiotics anyway.

So… what does this mean to you? A blog post dedicated to tick deterrents and bug bite solutions! Be excited!

Vinegar based repellent – the smell goes away. I promise! You won’t smell like vinegar all day. (I wish I had tried it BEFORE the bites, but so far I haven’t had any more.) This is based off an old recipe thought to have been used during the Plague.

Ingredients:
32 ounce bottle of Apple Cider Vinegar
2TBSP Each Dried Sage, Rosemary, Lavender, Thyme, and Mint (any varietal works but I prefer Peppermint or Spearmint because they have a stronger scent)
Quart Jar with Glass Lid

Directions:
Put the vinegar and dried herbs into large glass jar.
Seal tightly and store on counter or place you will see it daily. Shake the heck out of it each day for 2-3 weeks.
After 2-3 weeks, strain the herbs out and store in spray bottles.
Whenever you need it dilute it by half with water and spray freely knowing that nothing in the bottle is toxic! This is so easy!

Soothe those itchy bites

Tea Tree Oil, Lavender Essential Oil, Witch Hazel, or Emu Oil

Dab a few drops on the bite for immediate relief!

Do you have any tried and true suggestions! Please share!

Tuesday, March 19, 2013

I don't think you're ready for this jelly...

Would jelly by any other name still taste as sweet?


Yes. Yes it would. So jelly, conserve, or jam are all freaking delicious and they are insanely easy to make. Seriously, boil some fruit with sugar and pectin and you have jam. So freaking easy! I was intimidated for far too long by this simple art.

I have made this recipe a few times, and I like it to be more of a jam consistancy. I have included instructions if you prefer either conserve or jelly. This recipe has a delightfully sweet strawberry flavor with just a hint of mint in the finish. It is great on fresh bread, like what I made here, topping pancakes, or spooned over french vanilla ice cream. It is also a terrific way to use up mint if you happen to have an overabundance of it in your garden like I do. I normally buy strawberries when I see them on sale and clean and freeze them to make this when I have the chance!

Let's get started!


From these humble beginnings, awesome ensues.

To actually can your jam you are going to need: one boiling water canner (big pot with some sort of raised bottom, I use canning rings held together with twisty ties), soup pot, spoon, jars, lids, and canning rings. You could feasibly skip the canning step and use this like freezer jam, but I am not sure how long it will keep.

Sterilize your jars and lids. Wait for the jam.


For the Jam:
1 1/2 lb Strawberries, hulled and cut if large
2 1/2 C Sugar
2 handfuls of fresh mint give a rough chop (about 3/4 C dried)
1 1/2 TBS lemon juice
1 packet liquid pectin (use 0 if you prefer conserve, or 2 if you prefer jelly)

Mix the berries and sugar in your soup pot and let it set several hours or overnight at room temperature.
Set that baby on the stove and add your mint and lemon juice. Bring it up to a rolling boil for about ten minutes.


Boil, boil, boil the stuff. Until you want to scream. Merrily, merrily, merrily. Until it is done you deem.
At this point add your pectin if you're using it and return the pot to heat for one to two minutes. It will set up very quickly, so be sure to watch it for a distinct change to a very glossy, non juicy, gel-like finish.
(There are several ways to test for set, like keeping a plate in the freezer and seeing if the jam runs down it or gels, but noting the change between juice to gloss has worked very well for me.)


I use a measuring cup to pour the molten hot jam into the sterilized jars, but you can use a ladle and funnel if you prefer. Leave a one inch gap at the top of the jar. Cover with sterilized lids.


You can use tongs, but for about ten dollars they sell canning sets with nifty tools like these!


Then finger tighten the canning rings. Careful! It will be hot! Process the jars for ten minutes under boiling water.


Remove and cool. Make sure that your lids are depressed. If they aren't return the jars to the boiling water and process again, or store them in the fridge and use quickly. This jam will keep for about nine months unopened in a dark place. Like all jam, make sure to shove it in the fridge after you've opened it.

Well, that is if you don't eat the entire jar with a spoon. Which I may or may not have done. No witnesses!

Tuesday, March 12, 2013

DIY Newspaper Pots (otherwise known as Cat Bait)

Damn, I’m cheap, and I want to start some seedlings for my garden. What to do, what to do?
I should get one of those newspaper pot roller things. They’re great. I’m reusing old newspaper and I don’t have to transplant them. Plus all those damn plastic trays I bought last year didn’t hold up to the cat and dog laying on top of them, so I’m gonna have to do something for that anyway.

That thought process led me to getting an awesome little tool and losing about three hours of my life to making paper pots.

If you have read the rest of this blog you're going to know that I am not that big on measuring things, so it should come as no surprise when I tell you that I had no ruler and no idea of how long 3.5" actually was. So the first thing I did was cut my newspapers into fourths.


Okay, I lied. The first thing I did was wrestle the newspaper away from my cat and manage to miraculously not cut his feet off while I was trying to cut my newspaper. Such. A. Bad. Kitty. Seriously, if cats could take Adderall he would be on it.

Anyway, my lovely method of measuring yielded newspaper that was way too wide. Go figure. So rather than cutting it again I took the lazy way out and folded it. Wanna see how the cool little pot maker thing works? Yes? Awesome. Because I made you a montage. I hope you like it.


Quick! Go play Eye of the Tiger while you look at it!

Pretty sweet, yeah? I thought so too until I had to fill this. This being a big clear plastic tub that I had to buy and drill air holes in to protect all of my newly made pots, because someone, not going to mention any names *cough*MyGodDamnCats*cough, cough* decided to destroy all of them last time. Lets see them crush and shred them now! Yeah!


You might need to put it on loop for effect. That is three hours of Survivor right there.


DIY Disaster, well it is a dog house made out of pallets!

I was inspired by all of the cool things that people have done with pallets lately. http://howdoitcom.tumblr.com/post/43161225742/more-pallet-ideas The projects look amazing, and pretty simple, right? I am very interested in repurposing because: 1. It is cool, and 2. I’m cheap. Dog houses retail for about $150.00 a piece at the local feed store, and though I love my dog, I did not want to spend that much when I knew I could build one. How hard could it be, right? If only I had known. This isn't an exact tutorial, because if I had it to do over again I would do things a little differently. Think of it more as an inspirational piece! Anyway, not knowing what I didn't know, I decided to get crafty.

I have taken three things away from this experience. Saws-alls are not as easy to use as I thought. I am capable of using power tools, sorta. Most importantly, always pre-drill your holes! Dear Lord in Heaven pre drill your holes. It sounds like a stupid extra step, but it isn't. Across the path of least resistance danger lies in giant wooden chasms!

Hyperbole aside, I am lucky enough to have free access to small shipping crates with collapsible sides at work. For this project I used one crate bottom, two sides, two pieces of scrap lumber, one 1x4 board, and one salvaged crate lid cut to size. I also used a band saw, a miter saw, saws-all, a drill, sand paper, hammer, and 1 ¼” screws. Oh, and all my PPE. Gotta be safe!


I started out by setting the sides on the crate. I haphazardly decided on a door size and cut my scrap lumber to even lengths before screwing it onto the crate and learning the importance of pre-drilling holes. Without planning on it one end of my scrap wood fit perfectly into the space I had made with a few taps of a hammer, so I screwed that on too. Then I tried to cut out a nice rectangle using a saws-all. It didn’t work so well. I then absently wondered if they made bondo for wood, but went along anyway. It might not be pretty, but it was my creation damnit!

I was not very good at taking pictures of this one. Sorry guys, but do make sure to note the splitting wood and my freaking awesome saws-all job! That's ergonomic, or aesthetically pleasing, or something?!? Maybe?

I used my awesome measuring skills, ie holding it up and marking it with a pencil to determine the length I needed (but you could use a measuring tape) for the roofline which I cut in two sections, one piece being the length across the front and one the length of the sides. I then attached my front board to the poor, splintering frame I had made for the door and proceeded to draw a diagonal line across the side board so that when I cut it I would have two identical pieces.


Which I pre-drilled (see, learning!) and screwed to the front board. I chopped a scrap piece of wood in half and screwed the back ends of my diagonal pieces down for stability. I then grabbed a lid and screwed it on top of my angled boards. I then tried to sand down the doorway so Susan wouldn’t get splinters. It needs a few coats of waterproof paint, but Susan loves it. That’s the main thing.


Friday, March 8, 2013

SPRING!

Some people would say that this is oregano poking through straw. I prefer to call it SPRING! And it is about damned time!


Although, now instead of a to do list made up of cooking, eating, and catching up on my reading I have made a monster. My to do list looks like this:


Why am I excited it is spring again?

Oh yeah, BONFIRE!!!!!!

Wednesday, February 27, 2013

DIY Artisan Bread, with pictures!

Homemade bread is intimidating. I grew up on Bunny and Wonder, but fell in love with fresh baked bread courtesy of Panera while I was in college. One of my friends bought me The Joy of Cooking, and after staring longingly at the loaves (a 45 minute drive away from my house) and begrudgingly at the cookbook for about two years; I took the plunge into baking bread at home. I love it. I won’t ever go back.

Not only is making bread at home rewarding, it is also cheap. The recipe I am going to share only costs about .55 a loaf in dry ingredients. You can’t beat that!

Now, I am not a professional baker by any means. I’m still trying out new recipes at every turn, but I have tried about ten different recipes for everything from whole grain sandwich bread to nice Artisan bread like what I love at Panera. It has been one heck of a journey. Something about reading a recipe that says “knead until elastic” and trying to replicate it with no experience whatsoever was a bit, “challenging” (feel free to read that as curse inducing). Honestly, what is the baking definition of elastic? Knead thoroughly, but do not overwork, too much kneading will result in poor texture! There aren’t even any pictures to show what is elastic, or shiny, or whatever other baking jargon they have that I had no clue what it meant as a virgin baker. Agh! Talk about feeling overwhelmed.

That’s why I love this recipe, courtesy of Mother Earth Living. It gives a perfect loaf of bakery quality Artisan style bread every time, and there is no kneading! Let me tell you. This stuff is too good to be true. The baking gods will smile upon you and you too will fall in love with homemade bread!

Time commitment: Working time 10 minutes, Raising time 12-24 hours, Working time 10 minutes, Raising time 2-4 hours, Preheating time 20 minutes, Baking time 30-45 minutes

The ingredients are so straight forward that I have them memorized at this point.
¼ tsp yeast
1 ½ tsp salt
1 ½ c warm water
3 c flour, plus more for dusting your working surface and hands
You’ll also need cling wrap, kitchen towels, an oven, and a Dutch oven.


Dissolve your yeast in the warm water, this normally takes about five minutes for me. I stir the water after the yeast dissolves to mix everything up. It isn’t crucial, but it gives me peace of mind.


Add the salt and flour and stir with a non metal utensil until combined. This stuff is sticky, and yields a very moist, shaggy dough.


Cover it with cling wrap. I find that a rubber band can help keep the wrap on, which is important because this dough is going to sit for a loooong time. The recipe calls for 12-18 hours. I have left it raise for 24+ without problems.

The dough will rise to fill the bowl. The bubbles show that it is ready.
After the dough has risen flip it out onto a well floured surface, and make sure to dust your hands! Flip it over itself twice and shape it into a ball. Lay it on a well floured towel and cover with yet another floured towel (or floured, inverted bowl) to raise again 2-4 hours. I use the towel if I am home and will be able to work with the bread after two hours of raising, but if I have to leave it longer than two hours (I have done up to four) I use a bowl to better retain moisture.


So, you’re ready to bake? Pull out your Dutch oven and shove that baby in the oven while it is preheating to 475 degrees. The Dutch over retains moisture while you’re baking that replicates the steam injections that professional bakers use. After about twenty minutes pull out the Dutch oven and turn the bread into it. It will fall a bit, but that is okay. The baking process will even it out. Cover it and bake for thirty minutes. Uncover and cool, or let brown for an additional 10-15 minutes as you prefer.


It's a baking montage!
Make sure to let it cool for at about an hour before slicing, because the center is still baking and you don’t want to let the heat and moisture out. It will be tempting to take a nibble, but resist! I have tried both ways and waiting is worth it. After the bread cools, enjoy! This stuff is so great it doesn’t even need butter. Not that I am discouraging butter, but I can say that my test kitchen (co-workers) ate half a loaf completely plain, and that NEVER happens.


PS: If you want to check out the original recipe on Mother Earth Living here you go!