Showing posts with label inexpensive. Show all posts

Friday, May 23, 2014

GOOOOOAAAAALLLLLS


I would really appreciate someone following me around with a vuvuzela and blowing it wildly anytime I accomplish anything. It would make life oh so much more exciting!

Anyway, goals! Since drunk me decided to blab about my weight loss goals to my boyfriend (see my other blog). I figured I might as well share with you all my gardening and farming goals for this year. Something about transparency and accountability go hand in hand with accomplishment, right?

I want to be able to can enough tomatoes, pickles, and preserve enough potatoes that I don’t have to buy any all winter. Because well, I'm cheap and  I don't like eating pesticides or BPA. Plus, I always played "pioneer" when I was little and I am a little curious to see how hard it would have been to survive only on what I could produce. I'm just ramping up to it. SLOWLY! I’m not sure how it will work out with the potatoes yet, but here is to hoping!

I also want to make several more batches of jelly and herbal preserves. The house I just bought has a crab apple, apple, and apricot tree; in addition to the apple, peach, and pear trees up at my grandpa’s place. So canned and frozen fruit, jams, and jellies should abound! Provided I don’t kill myself mowing all the danged grass. I am so glad that I am going to have a bigger kitchen to work with!

Granted before I can play with that shiny big kitchen I have to gut the bathroom, add a second bath, rip up carpet and refinish floors, and repaint; but by God when I get all that done I will be up to my eyeballs in jelly!

Well, after I still manage to fix fence, get hay put up with Cap, and try to clean and repair the barn and grainery. Oh, and help dad clean out and sort all the stuff in my grandpa's sheds and greenhouse. But after that!

Or it will be next year and I can start my grand plans all over again. Whichever comes first, right? There is always tomorrow!

Monday, May 6, 2013

Reduce, reuse, and recy - play yard pong!

A few months ago a friend and I decided that we wanted to have a Cinco de May-O (spelled that way because we were going for a redneck theme) party. Because who doesn't want to celebrate a Mexican holiday with beer in a water trough? That party was on last Saturday, and I am pleased to say that it went very well.

One good and bad thing about hosting a get together is that it motivates you to get all of your little projects done. Like installing new laminate flooring and learning how to miter quarter round so that you can put a bed in your newly remodeled back bedroom two days before you are going to have guests staying in it and you also have to get all of the herbs planted that you bought at the botanical garden and mulch them in so that your yard doesn’t look like you held up a garden supply center at gun point.

Which is kind of what mine looked like at the start of last week. I hadn’t mown, there was a large pile of brush that I had earmarked for a bonfire along with a bunch of extra newspaper and empty cereal/cat litter boxes that I had saved for fire starters, I had probably close to thirty or forty plants laying around, ten bags of mulch in my back seat (Mercury Milans are surprisingly spacious. I can fit about four straw bales in there at once too.) and I had laminate scraps and the carpet I had ripped out laying around the yard. Actually, given the theme of the party I probably should have left it. Though redneck and white trash aren’t exactly identical…

Long story short, I was a little stressed but it all came together with the help of my friends from out of town. They took to helping me set up, cut trees, and cook with the kind of enthusiasm that makes me want to cry tears of joy. They even helped me put a stallion out on pasture the morning of the party. I have the **BEST** friends.

Having a party like that means that I have been slacking on the blogging front, and I am sorry. But it was a great time, and a fantastic way to develop new games. Like Yard Pong. Which combines the classic drinking game beer pong, with finally finding a use for all of the empty mineral tubs we have laying around. Sustainability and alcohol. It was a great combination.

Yard Pong
2 beach balls
12 empty mineral tubs
Drinks of your choice
Four players

Set the tubs up in a triangle (one, two, three tubs per row) with the tops of the triangle about 10-20 feet apart depending on your athletic ability. Take turns trying to hit the beach balls into the tubs. Use one ball per person on two, two person teams. The scoring is as follows.

If you hit the ball into the tub the opposing team drinks one drink for whichever score it is, first tub = one drink & sixth tub = six drinks.
If you don’t hit any tubs you take one drink.
If you bounce the ball off of a tub the opposing team drinks once for every time the tub is hit, beach balls ricochet well.
Two re-racks are allowed.

Needless to say we had a ball, and I am going to start selling used mineral tubs to college students. That’s one way to recycle and recoup the costs, right? Maybe? There is a whole market here just waiting to be tapped!


Tuesday, April 23, 2013

The morel of the story.

It is spring in southern Illinois, and that means mushroom hunting. In case you didn't know, finding fungus is a BIG past time in many rural areas. I know some people that spend hours and hours combing through the woods seeking out all sorts of edible wild mushrooms, but the crowning glory of wild edibles is the morel. They have a very unique flavor and texture, and are nearly impossible to grow on purpose. A pound of morels can sell for upwards of thirty dollars around here, but luckily for the average consumer adventurous enough to brave the ticks and snakes they can be found in almost every woods. But they are crafty little things.


It is the perfect excuse to enjoy the woods in spring!

Over the weekend mom and I engaged in this past time, and by engaged I mean she found mushrooms and I found just about everything else...


I found flowers.

And a turtle...

Some Jack in the Pulpit...

Some pretty mystery plant...

And about that time I had just about given up. Mom was walking around with a bag full of mushrooms, doing her "mushroom meditation." Which, though I want to mock, I can't give her trouble for because, you know, I found a turtle and she found a bag of morels. Go figure.


I found a wild Susan in her natural environment!

But the moral of the story with mushroom hunting, farming, and life in general is patience and perseverance! (Also enjoying the journey and not just the delicious and delectable destination!)


Happy hunting!

Tuesday, March 12, 2013

DIY Newspaper Pots (otherwise known as Cat Bait)

Damn, I’m cheap, and I want to start some seedlings for my garden. What to do, what to do?
I should get one of those newspaper pot roller things. They’re great. I’m reusing old newspaper and I don’t have to transplant them. Plus all those damn plastic trays I bought last year didn’t hold up to the cat and dog laying on top of them, so I’m gonna have to do something for that anyway.

That thought process led me to getting an awesome little tool and losing about three hours of my life to making paper pots.

If you have read the rest of this blog you're going to know that I am not that big on measuring things, so it should come as no surprise when I tell you that I had no ruler and no idea of how long 3.5" actually was. So the first thing I did was cut my newspapers into fourths.


Okay, I lied. The first thing I did was wrestle the newspaper away from my cat and manage to miraculously not cut his feet off while I was trying to cut my newspaper. Such. A. Bad. Kitty. Seriously, if cats could take Adderall he would be on it.

Anyway, my lovely method of measuring yielded newspaper that was way too wide. Go figure. So rather than cutting it again I took the lazy way out and folded it. Wanna see how the cool little pot maker thing works? Yes? Awesome. Because I made you a montage. I hope you like it.


Quick! Go play Eye of the Tiger while you look at it!

Pretty sweet, yeah? I thought so too until I had to fill this. This being a big clear plastic tub that I had to buy and drill air holes in to protect all of my newly made pots, because someone, not going to mention any names *cough*MyGodDamnCats*cough, cough* decided to destroy all of them last time. Lets see them crush and shred them now! Yeah!


You might need to put it on loop for effect. That is three hours of Survivor right there.


DIY Disaster, well it is a dog house made out of pallets!

I was inspired by all of the cool things that people have done with pallets lately. http://howdoitcom.tumblr.com/post/43161225742/more-pallet-ideas The projects look amazing, and pretty simple, right? I am very interested in repurposing because: 1. It is cool, and 2. I’m cheap. Dog houses retail for about $150.00 a piece at the local feed store, and though I love my dog, I did not want to spend that much when I knew I could build one. How hard could it be, right? If only I had known. This isn't an exact tutorial, because if I had it to do over again I would do things a little differently. Think of it more as an inspirational piece! Anyway, not knowing what I didn't know, I decided to get crafty.

I have taken three things away from this experience. Saws-alls are not as easy to use as I thought. I am capable of using power tools, sorta. Most importantly, always pre-drill your holes! Dear Lord in Heaven pre drill your holes. It sounds like a stupid extra step, but it isn't. Across the path of least resistance danger lies in giant wooden chasms!

Hyperbole aside, I am lucky enough to have free access to small shipping crates with collapsible sides at work. For this project I used one crate bottom, two sides, two pieces of scrap lumber, one 1x4 board, and one salvaged crate lid cut to size. I also used a band saw, a miter saw, saws-all, a drill, sand paper, hammer, and 1 ¼” screws. Oh, and all my PPE. Gotta be safe!


I started out by setting the sides on the crate. I haphazardly decided on a door size and cut my scrap lumber to even lengths before screwing it onto the crate and learning the importance of pre-drilling holes. Without planning on it one end of my scrap wood fit perfectly into the space I had made with a few taps of a hammer, so I screwed that on too. Then I tried to cut out a nice rectangle using a saws-all. It didn’t work so well. I then absently wondered if they made bondo for wood, but went along anyway. It might not be pretty, but it was my creation damnit!

I was not very good at taking pictures of this one. Sorry guys, but do make sure to note the splitting wood and my freaking awesome saws-all job! That's ergonomic, or aesthetically pleasing, or something?!? Maybe?

I used my awesome measuring skills, ie holding it up and marking it with a pencil to determine the length I needed (but you could use a measuring tape) for the roofline which I cut in two sections, one piece being the length across the front and one the length of the sides. I then attached my front board to the poor, splintering frame I had made for the door and proceeded to draw a diagonal line across the side board so that when I cut it I would have two identical pieces.


Which I pre-drilled (see, learning!) and screwed to the front board. I chopped a scrap piece of wood in half and screwed the back ends of my diagonal pieces down for stability. I then grabbed a lid and screwed it on top of my angled boards. I then tried to sand down the doorway so Susan wouldn’t get splinters. It needs a few coats of waterproof paint, but Susan loves it. That’s the main thing.


Wednesday, February 27, 2013

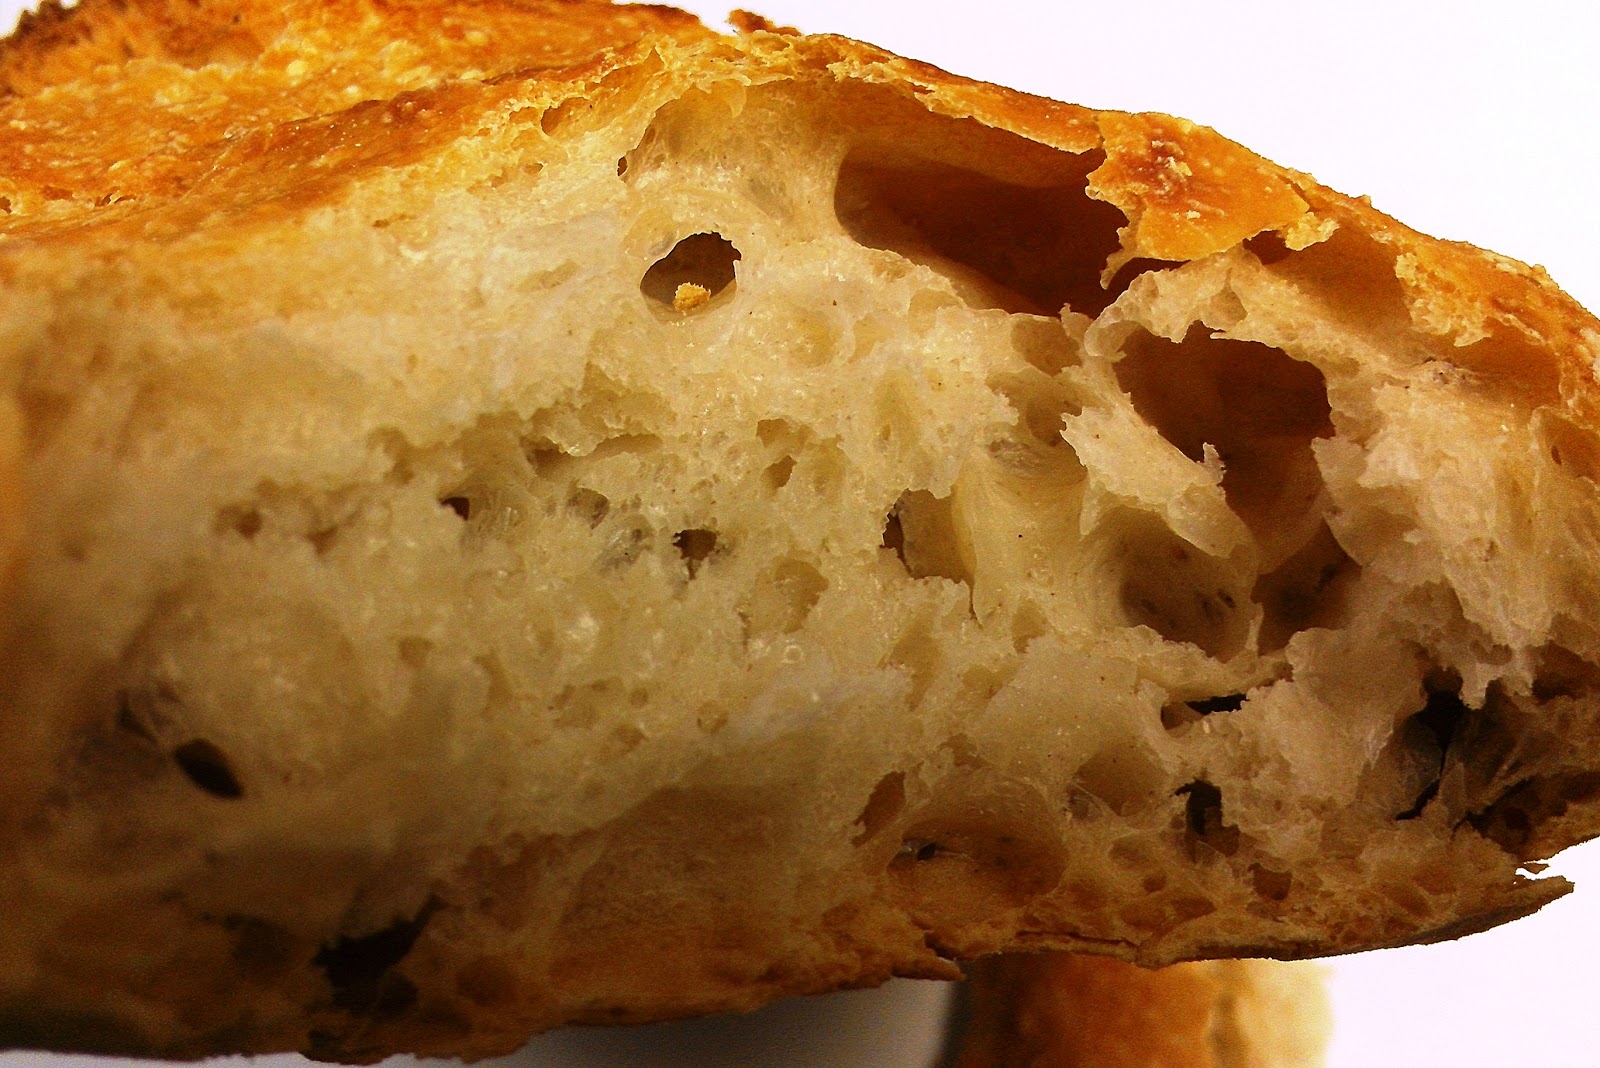
DIY Artisan Bread, with pictures!

Homemade bread is intimidating. I grew up on Bunny and Wonder, but fell in love with fresh baked bread courtesy of Panera while I was in college. One of my friends bought me The Joy of Cooking, and after staring longingly at the loaves (a 45 minute drive away from my house) and begrudgingly at the cookbook for about two years; I took the plunge into baking bread at home. I love it. I won’t ever go back.

Not only is making bread at home rewarding, it is also cheap. The recipe I am going to share only costs about .55 a loaf in dry ingredients. You can’t beat that!

Now, I am not a professional baker by any means. I’m still trying out new recipes at every turn, but I have tried about ten different recipes for everything from whole grain sandwich bread to nice Artisan bread like what I love at Panera. It has been one heck of a journey. Something about reading a recipe that says “knead until elastic” and trying to replicate it with no experience whatsoever was a bit, “challenging” (feel free to read that as curse inducing). Honestly, what is the baking definition of elastic? Knead thoroughly, but do not overwork, too much kneading will result in poor texture! There aren’t even any pictures to show what is elastic, or shiny, or whatever other baking jargon they have that I had no clue what it meant as a virgin baker. Agh! Talk about feeling overwhelmed.

That’s why I love this recipe, courtesy of Mother Earth Living. It gives a perfect loaf of bakery quality Artisan style bread every time, and there is no kneading! Let me tell you. This stuff is too good to be true. The baking gods will smile upon you and you too will fall in love with homemade bread!

Time commitment: Working time 10 minutes, Raising time 12-24 hours, Working time 10 minutes, Raising time 2-4 hours, Preheating time 20 minutes, Baking time 30-45 minutes

The ingredients are so straight forward that I have them memorized at this point.
¼ tsp yeast
1 ½ tsp salt
1 ½ c warm water
3 c flour, plus more for dusting your working surface and hands
You’ll also need cling wrap, kitchen towels, an oven, and a Dutch oven.


Dissolve your yeast in the warm water, this normally takes about five minutes for me. I stir the water after the yeast dissolves to mix everything up. It isn’t crucial, but it gives me peace of mind.


Add the salt and flour and stir with a non metal utensil until combined. This stuff is sticky, and yields a very moist, shaggy dough.


Cover it with cling wrap. I find that a rubber band can help keep the wrap on, which is important because this dough is going to sit for a loooong time. The recipe calls for 12-18 hours. I have left it raise for 24+ without problems.

The dough will rise to fill the bowl. The bubbles show that it is ready.
After the dough has risen flip it out onto a well floured surface, and make sure to dust your hands! Flip it over itself twice and shape it into a ball. Lay it on a well floured towel and cover with yet another floured towel (or floured, inverted bowl) to raise again 2-4 hours. I use the towel if I am home and will be able to work with the bread after two hours of raising, but if I have to leave it longer than two hours (I have done up to four) I use a bowl to better retain moisture.


So, you’re ready to bake? Pull out your Dutch oven and shove that baby in the oven while it is preheating to 475 degrees. The Dutch over retains moisture while you’re baking that replicates the steam injections that professional bakers use. After about twenty minutes pull out the Dutch oven and turn the bread into it. It will fall a bit, but that is okay. The baking process will even it out. Cover it and bake for thirty minutes. Uncover and cool, or let brown for an additional 10-15 minutes as you prefer.


It's a baking montage!
Make sure to let it cool for at about an hour before slicing, because the center is still baking and you don’t want to let the heat and moisture out. It will be tempting to take a nibble, but resist! I have tried both ways and waiting is worth it. After the bread cools, enjoy! This stuff is so great it doesn’t even need butter. Not that I am discouraging butter, but I can say that my test kitchen (co-workers) ate half a loaf completely plain, and that NEVER happens.


PS: If you want to check out the original recipe on Mother Earth Living here you go!