Showing posts with label baking. Show all posts

Tuesday, February 17, 2015

Simply Divine Sandwich Bread

Well, after a fantastic Valentine's weekend full of terrific gifts (He loved the picture, btw! :D And I got the most beautiful lilies and new measuring cups<- so excited!), and most importantly quality time, I'm ready to share with you that awesome bread recipe I mentioned last week.

It is adapted from one of the old handwritten recipes that my grandma left me years ago. It is perfect for toast or sandwiches. It is perfect for eating warm with butter. It is, in short, just all around awesome.


You're going to need:
Ten minutes to make the sponge, at least an hour of unattended rising
Ten minutes of kneading, at least an hour of unattended rising
Five minutes of punching and separating, at least an hour of unattended rising
30-45 minutes to bake
An oven
Greased loaf pans (two metal throwaway, or more if you use smaller glass pans, or a cookie sheet if you want to roll this into balls and make hamburger buns)
A large bowl
Plastic wrap
4 TBS Olive oil, plus more for drizzling
3 1/2 TBS Yeast
8+/- Cups Flour
3 Cups Warm water
3 TSP Salt
2/3 Cup Honey (I even had super old honey that had dried out and crystallized - it worked great!)
or 1/2 Cup white sugar

I personally use honey rather than sugar. Yes, it takes more flour. Yes, it is still delicious. If you want to play it safe and use sugar be my guest, but for what it is worth Captain America says the honey tastes better and I tend to agree with him. It also seems to help keep the bread moist - which with the lack of preservatives is a good thing to me.

Dissolve the yeast in the warm water for about five minutes. Add four cups of the flour, 4TBS olive oil, 3TSP salt, and whatever sweetener you're using. I generally add the honey first so that I can swivel the spoon around in the warm water to get it all off, but that is personal preference. Mix all of those ingredients up and cover with the plastic wrap. Let it rise until it is doubled.

Mm, spongey?

This mixture is what is referred to as a sponge. It generally only takes an hour to rise, but the longer you let the yeast sit and do its thing the better your bread is going to taste. Plus, the longer you let things sit the easier it is to work bread baking into your routine. I frequently begin the process on my lunch break and then bake in the evening or even in the morning before work.

They grow up so quickly!

I'm getting ahead of myself. After your sponge has doubled in size you need to add more flour. I generally add three cups and begin incorporating it with one hand (the texture is silky and a pleasure to touch). I then add the next cup (and maybe a little more) a little bit at a time until the dough all sticks together and you can touch it with your clean hand without giant clumps of dough sticking to you.


Punch that dough down. Have stress? Knead that bread. Here is the secret to our grandmother's not killing their husbands (not documented - but pretty sure).

As you can see above, I have taken to kneading the bread in my giant bowl and just drizzling the whole thing in olive oil and tossing it a few times to make sure it is covered, but you can easily knead it on any flat surface and place it in a separate oil coated bowl to rise again.

But why make more dishes? Hmm?

Cover that baby in plastic wrap, you can use the same stuff as before, and let it rise until doubled. It generally takes about an hour, but the temperature of your room has a lot to do with it. Generally 70-80 degrees makes all the little yeasties happy. But if it is colder than that and it takes a while to rise, or if you just ignore it for an extra two hours worry not! You aren't a bad baker. You're imparting more flavor into your bread. Now it isn't just bread, it is ARTISANAL sandwich bread. You're welcome.

KiYai! Bread punch!

Punch the dough down and let it rest for a minute or five before you divvy it up into your greased loaf pans. This recipe makes two loaves if your using the standard metal throwaway pans from a local super center, or three smaller loaves. Or a bunch of  hamburger buns. It's pretty flexible. Just remember that whatever you put it in it will double in size. You're warned. If you throw the whole thing in one loaf pan be prepared for Breadzilla overtaking your oven. Cover those pans with plastic wrap and let it rise until doubled. An hour on the counter, overnight in the fridge, again you're not ignoring it, you're imparting flavor.


When you're ready to bake, PREHEAT your oven to 350 degrees. I mean it. This is not a take and bake pizza that can be thrown in cold and bake as you go. Bread needs the oven to be piping hot to bake correctly. After your oven is properly preheated throw those loaves in and don't open it for at least 30 minutes. It will take 30-45 minutes of active baking time depending on your oven and your pans.

You can tell they are done when the top is golden brown and they ring hollow when tapped. Make sure to let them cool on the top of the stove or counter before you cut into them. The insides are still baking and you don't want to let that heat and moisture out too soon.

These loaves freeze VERY well in gallon freezer bags. Thaw them overnight in the fridge and toss them in the oven to warm up and you have a dinner addition that is sure to wow guests. Or just yourself. Just be warned it is really easy to eat a whole loaf!

This bread stores very well in gallon freezer or storage bags, I would strongly recommend using them. As it is a preservative free product it will dry out and become unappetizing rather quickly if you just leave it on the counter. It is great for bread pudding then, but it gets a little crumbly for anything else.

Thursday, January 8, 2015

Loaded Sweet Potatoes, Two ways!

I am on a sweet potato kick. I do not apologize for this behavior, but seeing as I have eaten them exclusively for the last three meals and two other days this week I thought I should share it with you. You know, for transparency. Or in case I turn orange. Seriously, that happened to my cousin once. She ate so many carrots that she literally turned orange.

I will keep you posted about the Oompa Loompa angle.

Oompa, Loompa, Doopa dee do.
I've got some delicious ideas for you.

Oh God, it has started...

I threw six sweet potatoes, washed and stabbed mercilessly with a fork, into a covered Dutch oven and baked them for about an hour and a half (until they were soft) on 350. I like to bake them in a covered dish rather than in foil because it feels wasteful. They steam, so they are a little softer, but it also makes the skins nice and soft and since I eat the skins too it works for me. Long story short, you need to bake the sweet potatoes. You could even *shudder* microwave them if that is what floats your boat.

From there you can always go classic - topping them with cinnamon sugar and butter. Since I have been trying to cut back on the refined sugars and dairy I dreamt up a different way of turning them into a breakfast sensation. Maple bacon sweet potatoes.

Yes. It is every bit as amazing as it sounds. No I didn't take a picture. I'm sorry. Not only did I not have my wits about me this morning (no coffee), I ate it too quickly.

I fried bacon, crumbled it and loaded my potato with about two strips worth and then tossed a couple walnuts and a drizzle of real maple syrup (Okay, yes, it is still sugar but a half tablespoon makes all the difference in taste to me. I'm trying to cut back, but balance is everything people!) and a dash of cinnamon. OMG. I'm not even hungry yet but I am still drooling.

Even better? You can make these ahead and heat and eat quickly on a busy morning. It is a great way to cut out gluten and dairy, and you could even use Agave or honey if you wanted less sugar. The complex carbohydrates and protein from the bacon and walnuts really go a long way towards feeling satisfied until my lunch break at one. For once it is 11:30 and I am not scavenging the office for popcorn or snacks; ready to eat my own arm...

And you know what is on my lunch break at one? Another sweet potato. Yes. A loaded sweet potato with black beans and kale. Yes, it is more delicious than it sounds. I admit, I was skeptical. I admit, I was wrong to doubt. I will let Kara Lydon give you the recipe from her blog - where I found it. http://karalydon.com/recipes/main-course/vegan-loaded-sweet-potato/ Don't let the vegan title scare you off. You won't even miss the meat. I promise! I made this bowl of yum last night (sans the dressing) and let me just say: it was heaven. I've never had black beans or steamed kale before, but I am quickly becoming quite passionate about the combo. It was the killer combination: tasted great, nutritious, and quick!

The only change I made was sautéing the kale without garlic and added 1/4tsp dried minced garlic right before I added the water. I had no fresh garlic on hand, and I can't say as though the substitution lacked flavor.

Here's to the noble sweet potato, and hopefully a better year for growing them than last year!


Otherwise I'm actually going to have to buy them by the 20lb bag to keep up with my habit. Not cool yo. Not cool at all.

Wednesday, July 16, 2014

Squash Boats

Ah, summer. 'Tis the season to be so overwhelmed with happy little squash plants that you wind up eating so much zucchini and pattypan squash that you can't even stand to look at it anymore; that is until the seed catalogs come out and you forget that you don't actually need to plant twelve squash plants of each variety because one of each would probably be enough.

And this is how you wind up getting ten precious little pattypan squashes a day. Not to mention the zucchini. Oh sweet Lord in heaven, the zucchini. Don't even get me started on the zucchini. Spoiler alert: everyone I know is gonna get zucchini bread for Christmas. 

But at least the zucchini I can just throw in the food processor, chop it up, and freeze it into what feels like sixty million gallons of ready to go zucchini puree. The pattypan squash though? While squash bread is probably a thing I decided to change it up a little and stuff some awesome squash boats. Hopefully by freezing these little suckers I won't have to eat so much squash that I can't stand to look at it anymore!

Without further ado I give you Lauren's Awesome Squash Boat Recipe (but you can call it your own - no judgement here!):

It's hard to eat just one!


1lb hamburger
1 can corn
1 can stewed tomatoes
1 can tomato sauce (I like hunts)
1 cup brown or wild rice
1 yellow onion, chopped
Four cloves garlic, chopped
Salt and pepper
Six to nine pattypan squashes (generally pick them when they are roughly 5 inches across or the skins get tough), or several large zucchini’s (halved)
1 bag shredded sharp cheddar cheese, if desired

Bring a pot of water to a boil and boil each pattypan for three to five minutes. They will be done when they can be easily pierced with a fork. (If you are using zucchini you can skip the boiling.) 

Scoop out a hollow in your squash to put the filling in, much like carving a pumpkin. You can save some flesh and small seeds to add to the filling if you like, but I throw mine into the food processor to use for squash bread later on down the line. Hey, waste not, want not. Right?

Meanwhile brown the hamburger with the onion and garlic. Salt and pepper to taste. Drain.

Also, meanwhile boil the rice according to package directions. Drain.

Mix the hamburger, rice, corn (drained), stewed tomato (not drained), and tomato sauce together. Let simmer until reduced. I chopped at the tomato chunks with the spoon to make them bite sized.

Fill your hollowed squashes to the brim with the meat mixture and cover with cheese if desired. At this point you can either freeze them for later use or bake them at 400 degrees until the cheese is bubbly and the squash cuts easily with a fork. **Baking time varies greatly depending on the size of your squash, and also how long you boiled it initially. Mine usually take about half an hour.**

Enjoy!

Wednesday, February 27, 2013

DIY Artisan Bread, with pictures!

Homemade bread is intimidating. I grew up on Bunny and Wonder, but fell in love with fresh baked bread courtesy of Panera while I was in college. One of my friends bought me The Joy of Cooking, and after staring longingly at the loaves (a 45 minute drive away from my house) and begrudgingly at the cookbook for about two years; I took the plunge into baking bread at home. I love it. I won’t ever go back.

Not only is making bread at home rewarding, it is also cheap. The recipe I am going to share only costs about .55 a loaf in dry ingredients. You can’t beat that!

Now, I am not a professional baker by any means. I’m still trying out new recipes at every turn, but I have tried about ten different recipes for everything from whole grain sandwich bread to nice Artisan bread like what I love at Panera. It has been one heck of a journey. Something about reading a recipe that says “knead until elastic” and trying to replicate it with no experience whatsoever was a bit, “challenging” (feel free to read that as curse inducing). Honestly, what is the baking definition of elastic? Knead thoroughly, but do not overwork, too much kneading will result in poor texture! There aren’t even any pictures to show what is elastic, or shiny, or whatever other baking jargon they have that I had no clue what it meant as a virgin baker. Agh! Talk about feeling overwhelmed.

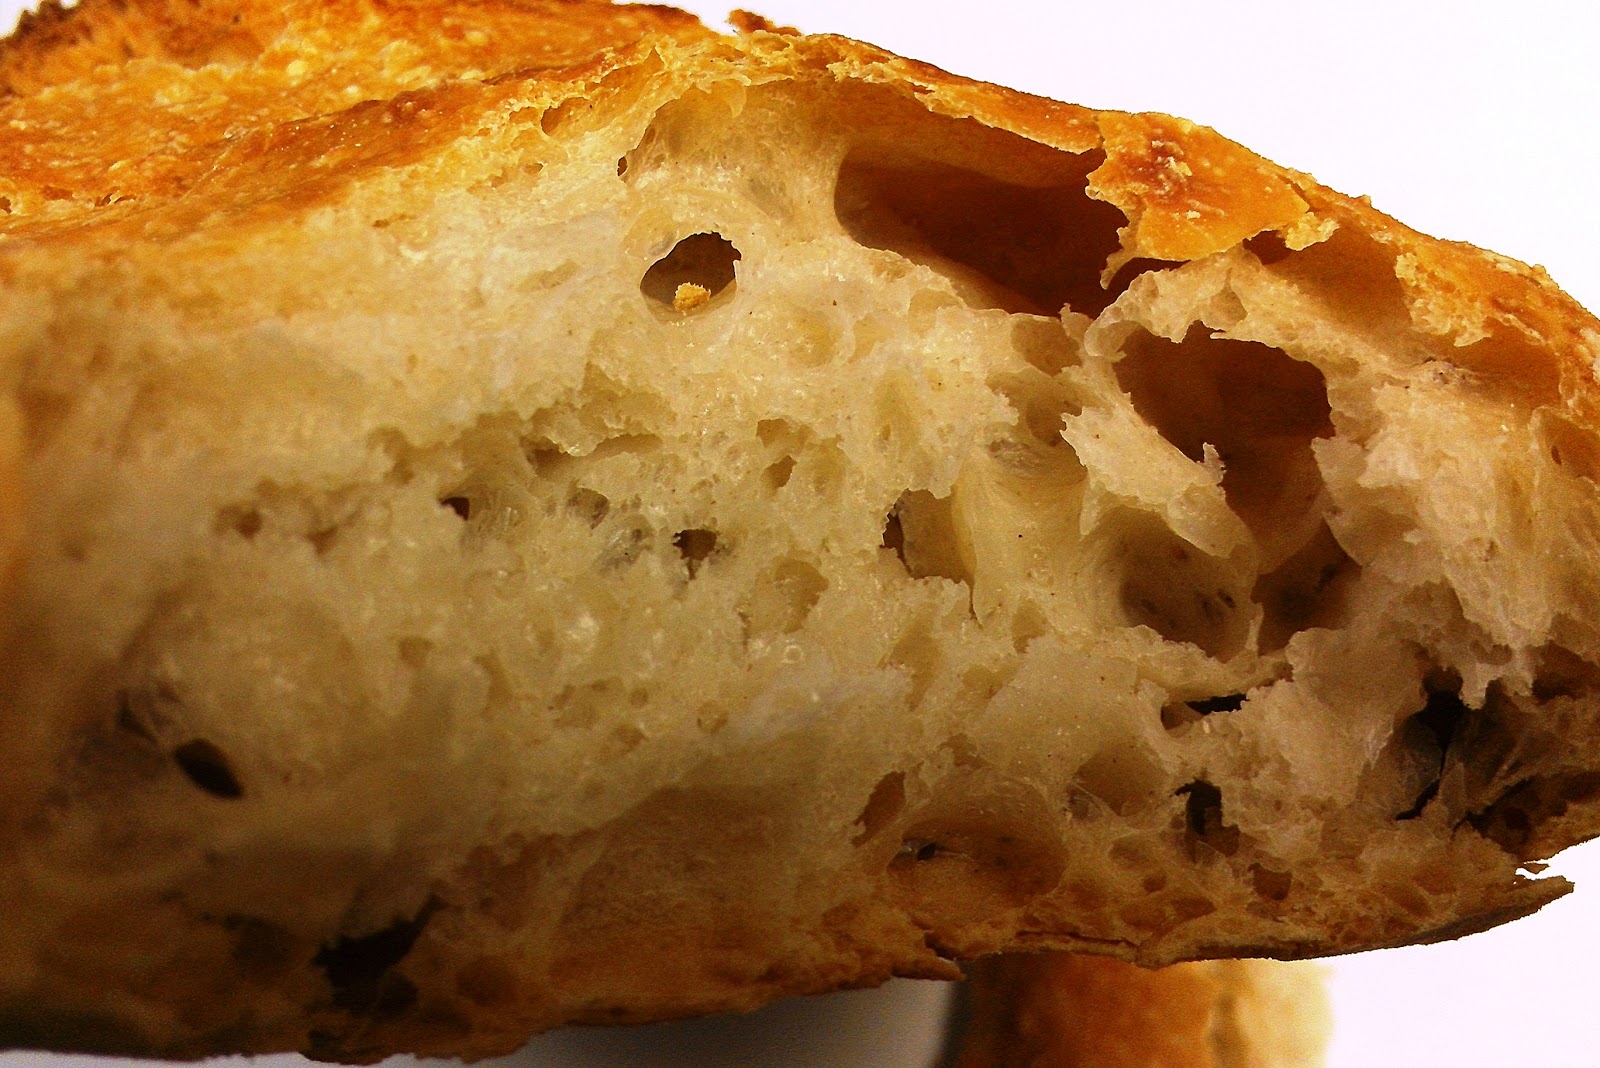
That’s why I love this recipe, courtesy of Mother Earth Living. It gives a perfect loaf of bakery quality Artisan style bread every time, and there is no kneading! Let me tell you. This stuff is too good to be true. The baking gods will smile upon you and you too will fall in love with homemade bread!

Time commitment: Working time 10 minutes, Raising time 12-24 hours, Working time 10 minutes, Raising time 2-4 hours, Preheating time 20 minutes, Baking time 30-45 minutes

The ingredients are so straight forward that I have them memorized at this point.
¼ tsp yeast
1 ½ tsp salt
1 ½ c warm water
3 c flour, plus more for dusting your working surface and hands
You’ll also need cling wrap, kitchen towels, an oven, and a Dutch oven.


Dissolve your yeast in the warm water, this normally takes about five minutes for me. I stir the water after the yeast dissolves to mix everything up. It isn’t crucial, but it gives me peace of mind.


Add the salt and flour and stir with a non metal utensil until combined. This stuff is sticky, and yields a very moist, shaggy dough.


Cover it with cling wrap. I find that a rubber band can help keep the wrap on, which is important because this dough is going to sit for a loooong time. The recipe calls for 12-18 hours. I have left it raise for 24+ without problems.

The dough will rise to fill the bowl. The bubbles show that it is ready.
After the dough has risen flip it out onto a well floured surface, and make sure to dust your hands! Flip it over itself twice and shape it into a ball. Lay it on a well floured towel and cover with yet another floured towel (or floured, inverted bowl) to raise again 2-4 hours. I use the towel if I am home and will be able to work with the bread after two hours of raising, but if I have to leave it longer than two hours (I have done up to four) I use a bowl to better retain moisture.


So, you’re ready to bake? Pull out your Dutch oven and shove that baby in the oven while it is preheating to 475 degrees. The Dutch over retains moisture while you’re baking that replicates the steam injections that professional bakers use. After about twenty minutes pull out the Dutch oven and turn the bread into it. It will fall a bit, but that is okay. The baking process will even it out. Cover it and bake for thirty minutes. Uncover and cool, or let brown for an additional 10-15 minutes as you prefer.


It's a baking montage!
Make sure to let it cool for at about an hour before slicing, because the center is still baking and you don’t want to let the heat and moisture out. It will be tempting to take a nibble, but resist! I have tried both ways and waiting is worth it. After the bread cools, enjoy! This stuff is so great it doesn’t even need butter. Not that I am discouraging butter, but I can say that my test kitchen (co-workers) ate half a loaf completely plain, and that NEVER happens.


PS: If you want to check out the original recipe on Mother Earth Living here you go!

Friday, February 22, 2013

Farming Foible or Agrarian Adventure?

I am what you might call an accidental gardener. I was bred, born, and raised on a farm, but I have an intense aversion to getting dirty. Mess with cows and horses? Any day! But gardening was something that my grandparents did. Canning? Pah. Why, when I could go to the store and buy a .25 can of corn? Baking and cooking were things that I have always enjoyed, and I’m going to blame them for my recent garden obsession.

It started with a windowsill box of herbs for cooking. I was sick and tired of paying five dollars or more for a tiny bunch of basil. Watching the tiny green sprouts of basil and garlic chives changed something in me. The next year I had a full out herb garden. The year after? Well, let’s just say that I didn’t do my research and jumped into vegetable gardening with abandon. There may or may not have been an overabundance of zucchini at my house. (Who knew five plants would produce that much, other than every other gardener in the history of the world? In fact I may or may not have had zucchini in some way shape or form two meals a day for about three months.) Faced with the bumper crop of herbs, fruits, and vegetables I had to figure out what to do with it all. A few frantic phone calls to my grandpa later and I was officially canning jams and jellies, making flavored oil, and learning how to best freeze pesto and dry squash. Just like that I fell into it. And now I can’t imagine my life without digging around in my garden despite the mess. I have learned a few tricks along the way, and I’m sure there are going to be many more to learn as I go.

This year is going to be different. This year I have a plan. I know that dish soap under my nails will keep dirt from getting in them. I know that I am going to be inundated with squash and zucchini and delicious tomatoes. I have researched and plotted. I have studied companion planting books and seed catalogs. I have literally spaced out my garden on graph paper according to how it should grow best.

And I am positive that I will continue to muck it up, and I will be overwhelmed and it will be under watered, and that my garden will grow regardless. That’s one of the best things about gardening. It puts it all in perspective. It is humbling and empowering at the same time.

So I invite you to join me farmer, gardener, or none of the above as I set out to grow some produce, learn to use it, and hopefully grow and learn as a person in the process. I hope my tales are entertaining, enlightening, and well, enlivening.

But enough of the tree hugging, earth loving bit. Let’s go grow something! (Like seed catalog debt. Since, you know, it is February and I can’t plant anything inside because my cats keep eating all my seedlings.) Or take cow pictures! Because who doesn’t love cow pictures?

See, isn’t that precious?

Or we could bake something:
Because well, bread is AWESOME.

So many things to do, so many posts to write! Until next time!